Introduction to Beaded Flower Bracelets
Beading is a fun and creative hobby, and beaded flower bracelets are a charming way to express creativity. These bracelets feature small beads arranged to mimic the delicate petals of flowers. Typically consisting of a series of daisies, these bracelets can add a pop of color and whimsy to any outfit.
Learning how to make beaded flower bracelets is surprisingly simple. With basic supplies and a few key techniques, anyone—from beginners to seasoned crafters—can make their own beautiful jewelry. Plus, once you master the technique, you can explore variations and create an array of unique designs.
Not only are these bracelets a joy to make, but they also serve as thoughtful, handmade gifts for friends and family. They’re perfect for birthdays, holidays, or just as a special token to show someone you care. Ready to dive into the world of beaded flower bracelets? Let’s gather our supplies and get started on crafting these delightful accessories.
Essential Supplies for Crafting Beaded Bracelets

To start making beaded flower bracelets, you need the right supplies.
Choosing the Right Seed Beads
Size 8 seed beads are ideal for flower patterns. They must be large enough for the elastic to pass through twice. Different colors can create various floral effects.
The Importance of Elastic and Beading Needle
Elastic should be thin, around 0.5 mm, to fit through bead holes. A beading needle makes threading beads easier, especially if it’s flexible.
Additional Tools: Beading Tray and E6000
A beading tray helps keep beads sorted and in place. E6000 glue secures the ends of the bracelet after knotting the elastic.
Step-by-Step Guide to Making a Beaded Flower Bracelet
Preparing Your Workspace and Materials
Plan your design by sketching it out or laying out beads on a flat surface. Decide how many flowers you want and what colors and shapes you’ll use.
To begin crafting your beaded flower bracelet, set up a clean and organized workspace. Start by laying out all your materials – seed beads, elastic, beading needle, and any additional tools like a beading tray. Secure the end of your elastic with a small piece of tape to prevent beads from slipping off during assembly. Using a beading tray can help organize your beads by color or size and hold them steady while you work.
Creating the Flower Pattern
To make the flower pattern, start with the center bead of the flower. Choose a contrasting color for visual appeal. Thread five beads onto the elastic, representing the petals. Slide these beads to the base near the taped section. To form the first petal, loop back through the first bead after the center bead.
Doubling Back Technique for Secure Flowers
Utilizing the doubling back technique enhances the sturdiness of the beads in the flower pattern. After creating the first petal, add three more beads for the remaining petals. Loop the elastic back through adjacent beads to tighten and secure the pattern. This method prevents the beads from loosening and maintains the flower’s shape. Repeat these steps for additional flowers to extend the bracelet.
Variations and Creative Ideas for Flower Bracelets

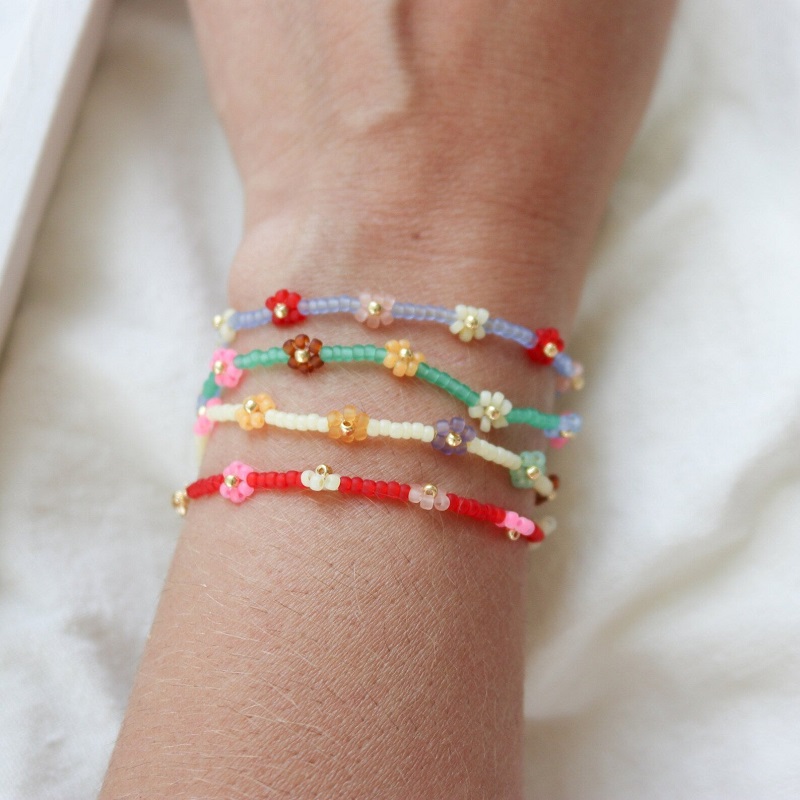
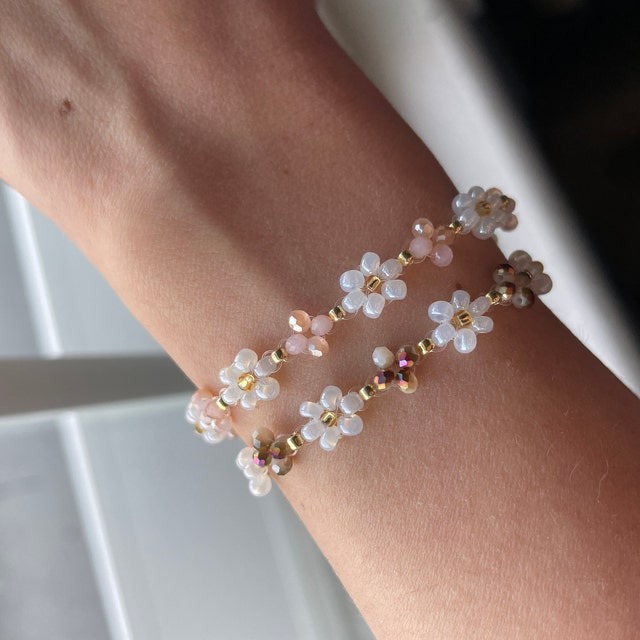
When you know how to make beaded flower bracelets, the fun part begins – experimenting. By varying the number of petals or changing bead sizes, your bracelets can adopt an entirely new look. Creativity is your only limit as you explore the numerous ways to customize these lovely accessories.
Experimenting with Petal Counts and Bead Sizes
Start by altering the number of petals. Using five beads creates smaller, more elevated flowers, while six beads might make the flower look incomplete. Seven beads are standard for a full flower, but eight beads, especially with a larger center bead, can give a lush look.
Next, play with bead sizes. Larger beads can be used for the flower’s center to add uniqueness. Remember that changing bead size will affect the bracelet’s overall design and may require adjustments in spacing.
Incorporating Spacers and Words
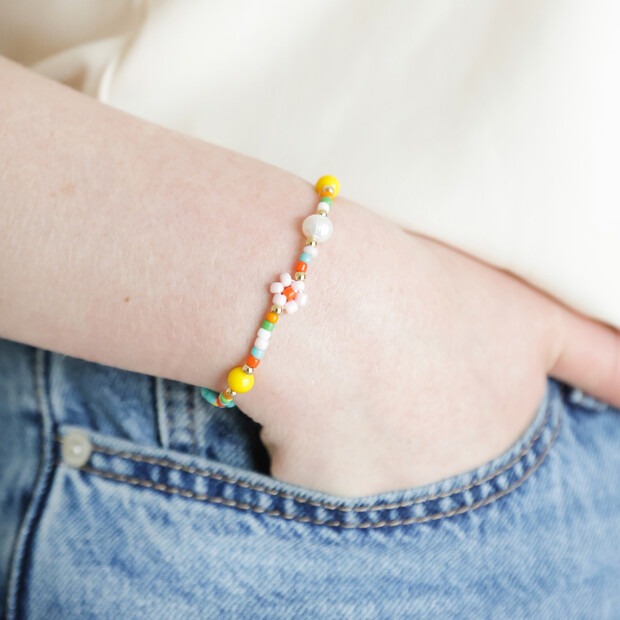
Adding spacers between flowers can enhance the bracelet’s visual appeal. Beads, small charms, or even letters that spell out a word or name add personalization. A trend is to combine ‘BFF’ or inspirational words with flower patterns for a meaningful accessory.
Color Combinations for Different Floral Looks
Color choice can transform your beaded flower bracelets into different types of blooms. Think of classic daisies with white petals and a yellow center, or create sunflower-inspired designs with brown centers and yellow petals. Mix and match colors to replicate a garden of flowers on your wrist.
By embracing these variations, you’ll be able to craft a diverse collection of beaded flower bracelets that express your unique style or convey a special sentiment to the recipient. So get creative, mix it up, and enjoy the endless possibilities of beaded flower bracelet designs.
Expanding Your Craft: Beyond Bracelets
Once you’ve mastered how to make beaded flower bracelets, why stop there? Take your crafting skills further by creating a matching set of jewelry. Let’s explore how you can use the same techniques to make beaded flower rings and necklaces, expanding your handmade collection or gifting options.
Making Beaded Flower Rings and Necklaces
With the basics down, rings and necklaces are just a step away. For rings, use fewer beads to fit around a finger instead of a wrist. Adjust the length of the elastic for necklaces. Mix and match colors for fun or go elegant with a monochrome palette.
Stick to the flower-making technique you’ve learned, keeping the doubling back method for durability. For necklaces, consider making a statement piece with several flowers or a simple pendant with a single bloom.
Crafting Flower Earrings for a Complete Set
Earrings add the perfect finishing touch to your beaded flower collection. Use a smaller number of beads for a subtle look, or create larger flowers for a bold statement. You’ll need earring hooks and a bit of extra attention to ensure the beadwork is symmetrical.
Follow the flower pattern and attach your creation to the hooks. Try different designs to match your bracelets and rings. Now you have a full set, ready to wear or give away as a carefully curated collection.
Your beaded flower bracelet is complete! Wear it yourself or give it as a thoughtful handmade gift.
By expanding your craft to include rings, necklaces, and earrings, you create endless opportunities to experiment with beaded flower jewelry. So, craft on, and embrace the excitement of designing your own matching sets!
Conclusion and Sharing Your Creations

Wrapping up, we’ve covered the joy of making beaded flower bracelets. From picking out the perfect seed beads to finishing your very own handmade jewelry, we hope you feel equipped to craft with confidence. Don’t forget the power of color and the beauty of variation. Whether you choose to stick with classic daisies or venture into vibrant sunflower designs, your bracelets are sure to dazzle.
As you master these skills, why not show off your work? Share your beaded creations with friends or on social media. Encourage others to try their hand at this delightful craft. Gifting your beaded flower bracelets can also spread joy. Imagine the smiles as friends unwrap a bracelet you made just for them.
Start simple, aim for fun, and remember that practice brings perfection. Let your creativity bloom in every piece you make. Happy beading!

